Video http://hsps.pro/Dentrix/New_Features/G65/Appointment_List_New_Feature_Overview.mp4
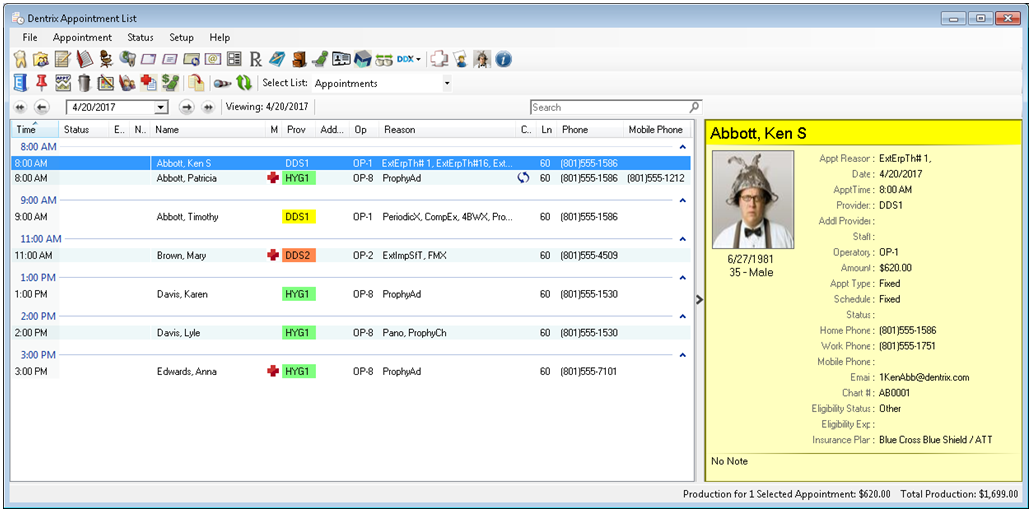
The Appointment List displays all appointments scheduled in the Appointment Book for a selected date. In the Appointment List, you can view the time, status, eligibility, patient name, provider, operatory, reason, length, and patient phone numbers for the appointment. You can also see the production amount totals for the selected appointment and the day.
To open the Appointment List window
1. In the Appointment Book menu, click Appt List.
The Appointment List window appears.
Note: The Appointments view displays all scheduled appointments for the date selected in the Appointment List, not the date you may have been viewing in the Appointment Book when the Appointment List was launched.
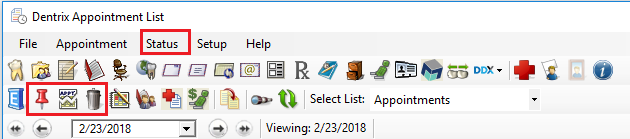
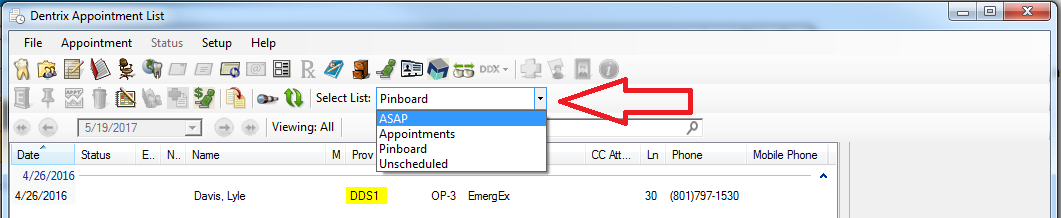
2. Use the Select List drop down to choose between the following appointments lists:
- ASAP - often patients that want to be seen/scheduled sooner
- Appointments - appointments on the schedule
- Pinboard - appointments added to the pinboard
- Unscheduled - broken, pinboarded, or willcalled appointments
- Will call - patients that have not selected a date and time
3. Click the date down arrow and select a date from the calendar to view the appointments for that day rather than the current one.
4. Double-click an appointment to see more information about or to make changes to the appointment.
The Appointment Information dialog box appears from which you can make the changes you want to the appointment.
Managing Selected Appointments on the Currently Viewed List
Change Status, Pin, Break, Delete one or multiple selected appointments in the view all at once instead of one at a time!
To get started, simply select random appointments using the CTRL + mouse click (to select randomly), or a range of appointments using SHIFT + select first and last appointment in range desired (All selected appointments will be highlighted in the range).
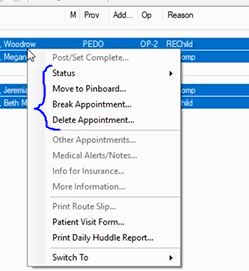
Now either click on Status, Pin, Break, or Delete from either the tool bar icons ( or right click over the selected appointments and choose the option from the context menu strip), and then confirm the action for the selected appointments.
- Menu/Tool bar Icons: (Status from File menu, and Pin, Break, Delete, from icon toolbar)
- Right Click context menu:
Note: Managing selected appointments in the currently viewed list is NOT associated in any way to the File, Purge....functions (see KB 18977 and KB 15464 for specific "Purge Appointment" functionality).
Columns - Sorting, Adjusting Size, and Hiding
With the new Appointment List design, you can sort the appointments by the column. Just click on the column name and the Appointment List will sort by that column. Refreshing the Appointment List will set the sort back to default by Date.
You can now customize your Appointment List by changing the column width and hiding the columns not needed to view. When the Appointment List closes, the settings are now saved and will reopen with the same layout. To choose the columns to view or hide, just right click on the column headers and choose accordingly. The default can easily be reset by right clicking on the column headers and choosing Unsort.
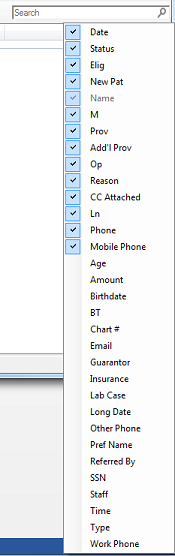
NOTE: There is no print option within the Appointment List. Print the list from Office Manager Reports Lists Daily Appointment List.
You can also lock the sorting selection by right clicking on the column header of your choice and choose Lock Grouping on..
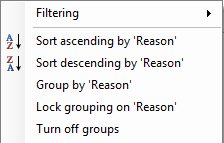
NOTE: All settings seen in the picture above will only be set for as long as the Appointment List is open. Sorting will go back to default if closed and opened again.