You can schedule an event to block out time in the Appointment Book to set up individual operatory schedules or to close an operatory for a day or up to a week. Events can include such items as staff meetings, vacation schedules, or individual operatory schedules. Events, in essense, acts like a non-patient 'appointment.'
1. From the File menu, click Schedule Event. The Schedule Event dialog box appears.
2. In the Operatories list, select the operatory or operatories that you want to schedule an event for.
3. Under Event Time, select Close Operatory (All Day Event) if you need to close the entire day, or specify a Start and an End time if the event will only last part of the day.
4. Under Event Days, specify the day or days when the event will occur.
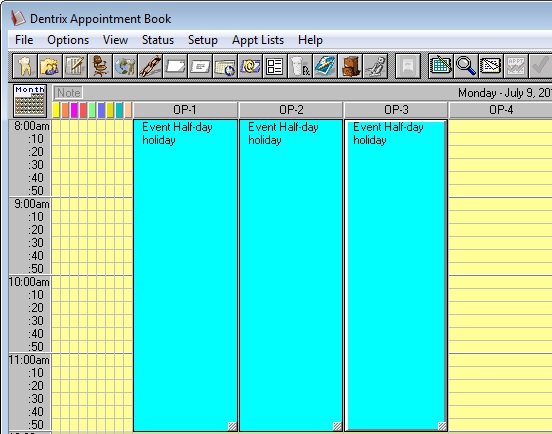
5. In the Description field, enter a description of the event.
6. If you want to center the description on the Event icon, select CenterDescription on ScheduledEvent.
7. In the Notes field, enter any notes that apply to the event. NOTE: Notes will be within in Event but will not display on the event itself in the Appointment Book. To access the notes, the event must be opened.
8. If you want to include a dateline in the Notes field, click Insert Dateline.
10. Click Event Color. A Color palette appears.
11. Select a background color from the palette and click OK.
Note: Selecting a color that is too dark may obscure the black text of the Event description and note. For example, black text will not be easily readable on a dark blue background.
12. Click OK in the Edit Event dialog box to schedule the event.
ADDITIONAL INFORMATION:
To have an event repeat (i.e. An event that repeats every week for an entire year), select a year range in the Start and End field for Event Days, then check the day of week the event will occur on.
If an event was deleted it is permanently removed and cannot be retrieved. This includes any notes inside of the event. Deleted or changed events are not tracked on the Audit Trail report.