Instructs how to create a future due payment plan.
Choose a patient from the Ledger, select Transaction, then Process Future Due Payment Plan.
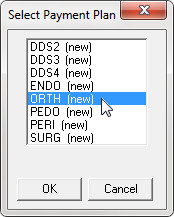
Select the provider for the payment plan and click OK.
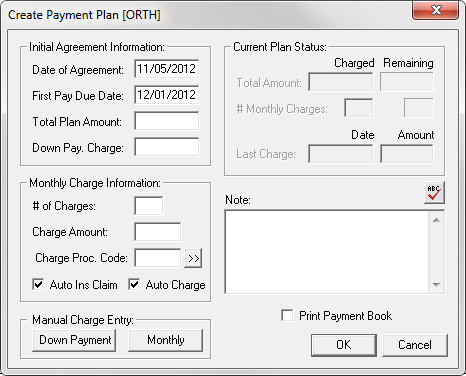
Update the Date of Agreement and First Payment Due Date fields as necessary. The fields default to the current date.
Enter the Total Plan Amount and the Down Pay Charge amount if charging a down payment fee.
Enter the # of Charges or the Charge Amount.
Click >> by the Charge Proc. Code field and select the appropriate procedure code to post with the monthly charge (choose D8670 if this is the code you want to appear monthly on the patient's statement).
Select the Auto Ins Claim and Auto Charge checkboxes if you would like the insurance claims and charges to be posted automatically. Uncheck the boxes if you would like to generate an insurance claim and post a charge manually.
If a down payment was collected, select Down Payment, enter the Amount and Date, select the Procedure Code, and click Post Charge.
Enter payment note in the Note field if desired.
Select the Print Payment Book checkbox if the patient would like a payment or coupon book.
Select OK to complete the payment plan.
For more information on updating Future Due Payment Plans: